Manage
Daily Use
Edited
Using RoomHub as a BYOD system
Connect your own laptop and start a meeting in seconds.
Overview
RoomHub supports BYOD (Bring Your Own Device) mode once it's installed and configured.
Connect your laptop and start the meeting. No room-side setup is needed.
———————————————————————————————————————————————
Before you begin
Make sure RoomHub is already installed and ready for use.
If it isn't, complete setup first using your deployment method.
Note: Once RoomHub is deployed, no extra configuration is needed for daily BYOD use — this is what makes it reliable from one meeting to the next.
———————————————————————————————————————————————
Use RoomHub in BYOD mode
Using RoomHub as a BYOD system takes three steps:
Connect your laptop to RoomHub using a USB cable.
Select RoomHub as your audio device on the laptop.
Start your meeting.
That's it.
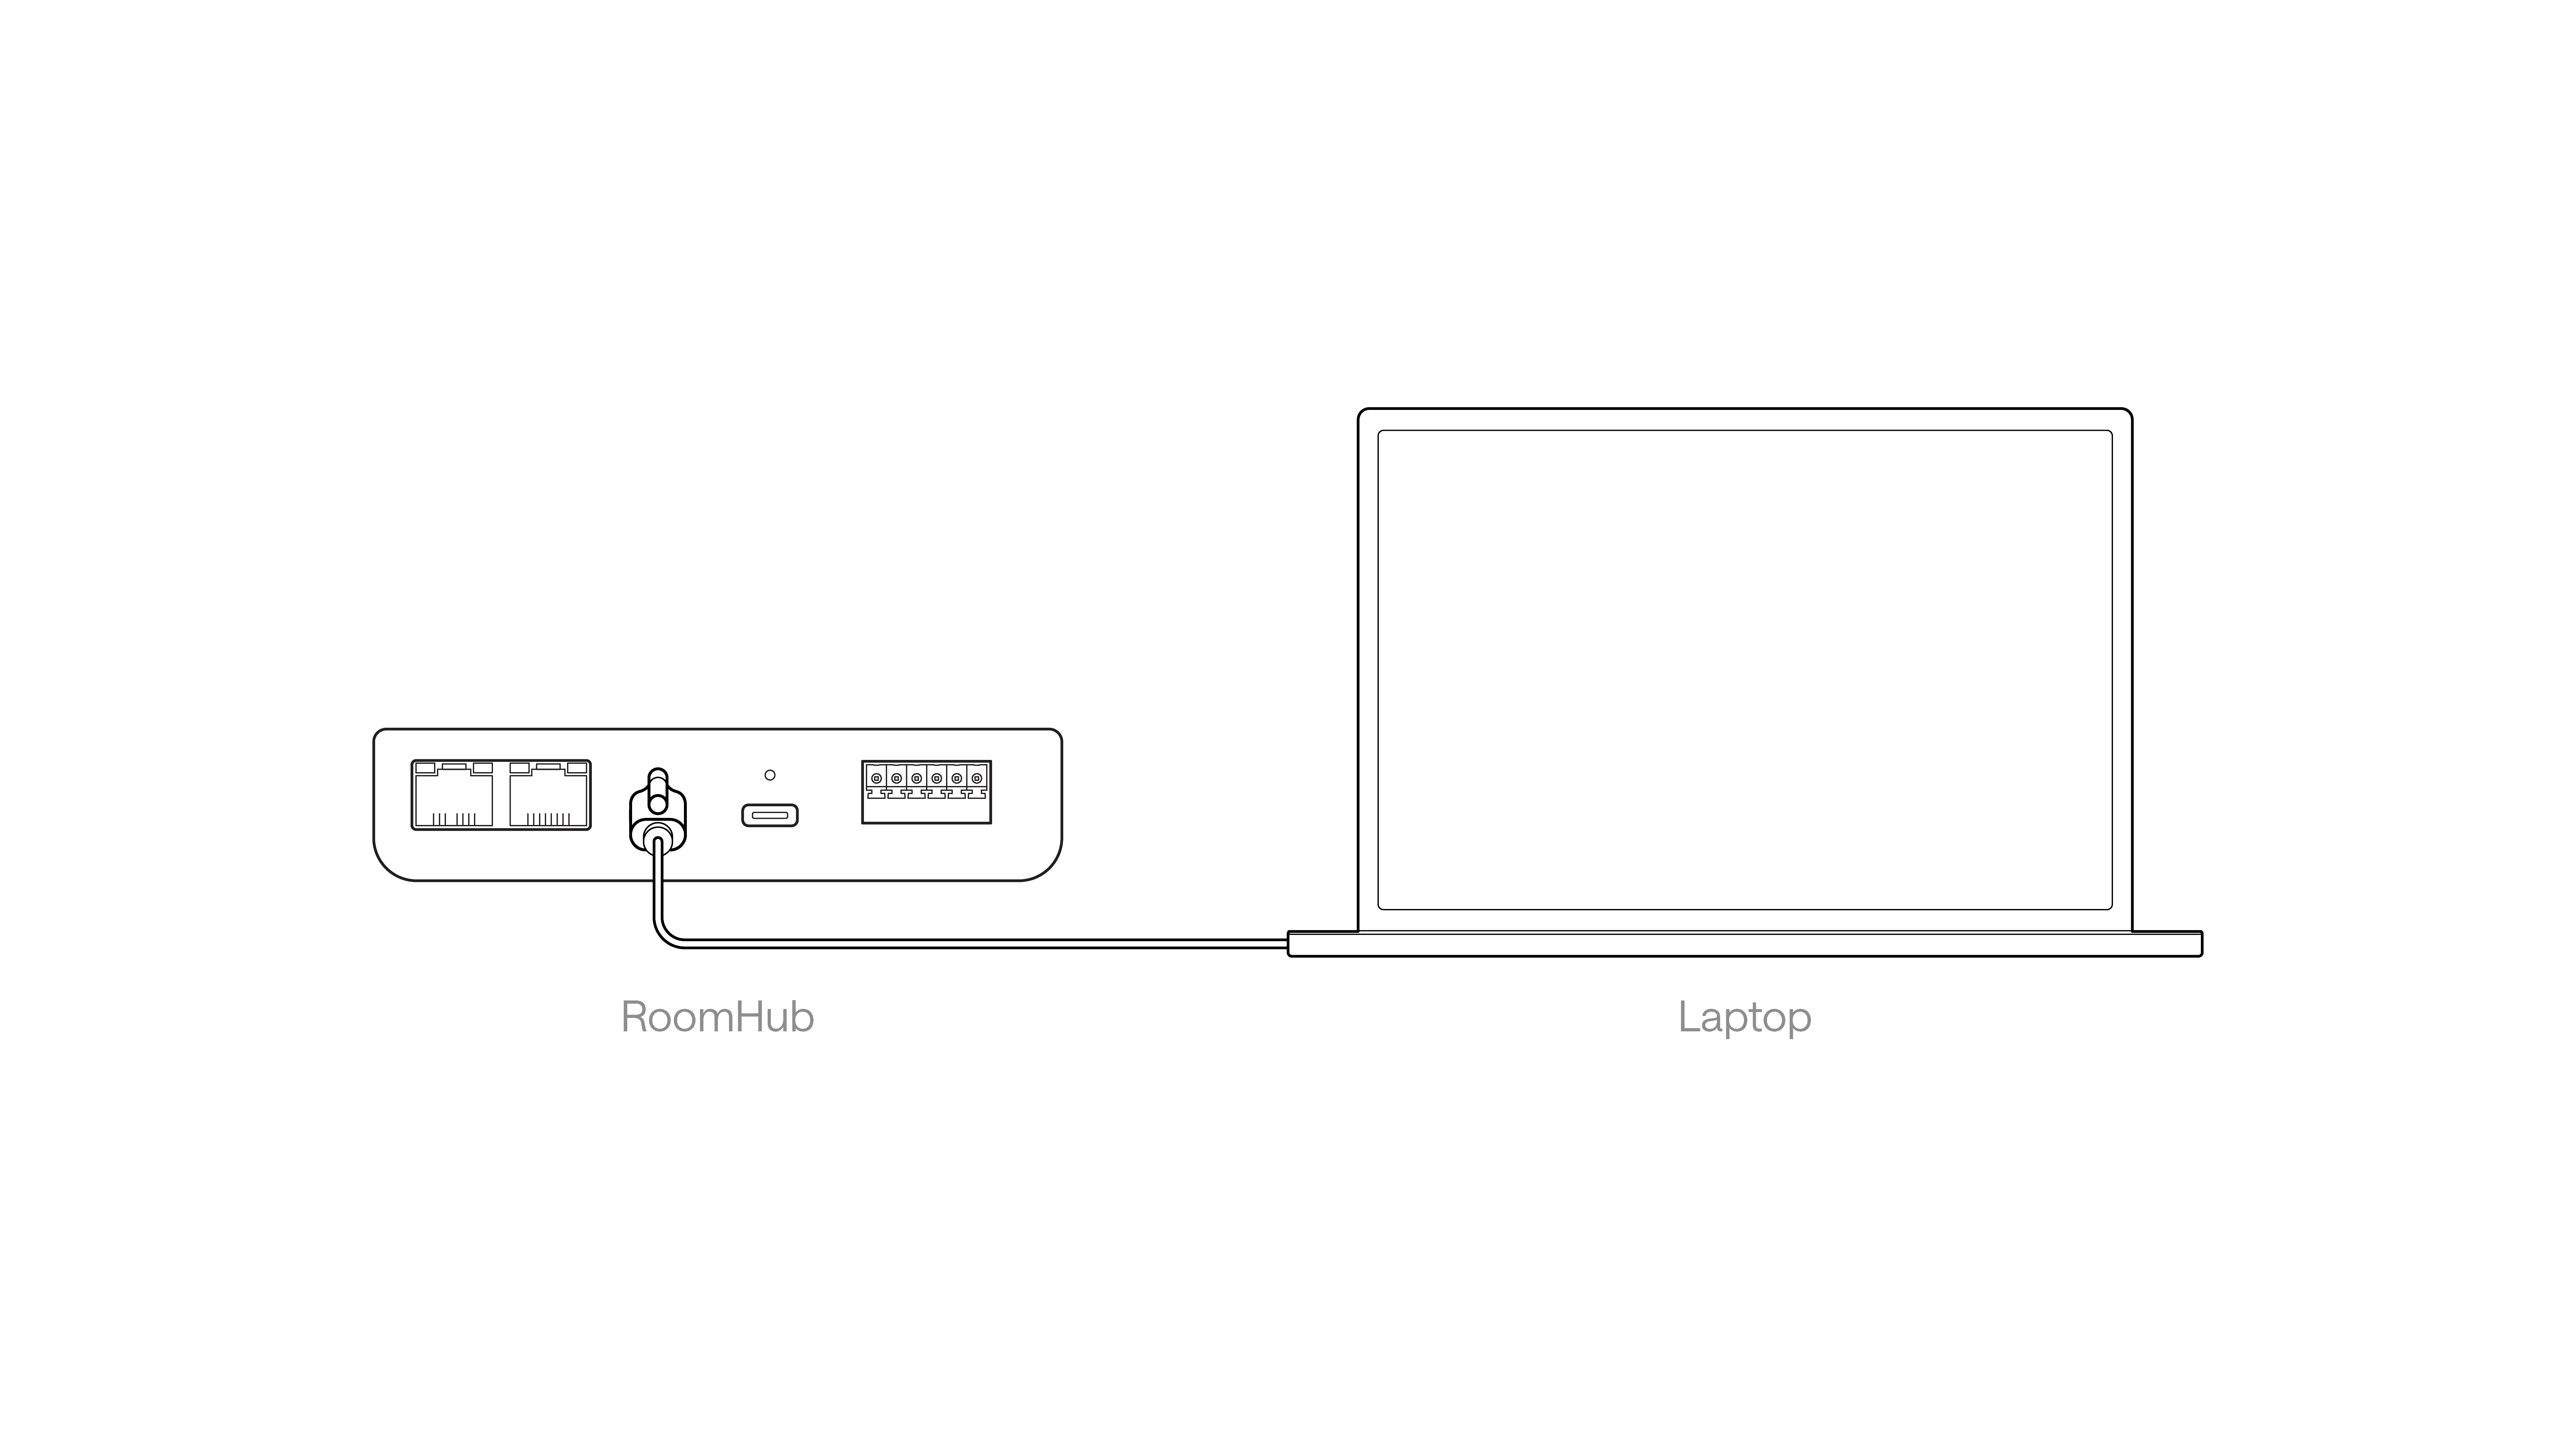
While connected, automatic camera tracking stays active, and mute and volume are controlled directly from your laptop. RoomHub runs quietly in the background, so there's nothing else to manage during the call.
———————————————————————————————————————————————
Connect audio and video together
If your room includes a PTZ camera, you can combine audio and video into a single laptop connection.
Recommended setup:
Connect the PTZ camera's USB video output to a USB hub.
Connect RoomHub to the same USB hub.
Connect the USB hub to your laptop.
This gives you one clean connection for both audio and video, which keeps cabling simple in shared or multi-purpose rooms.
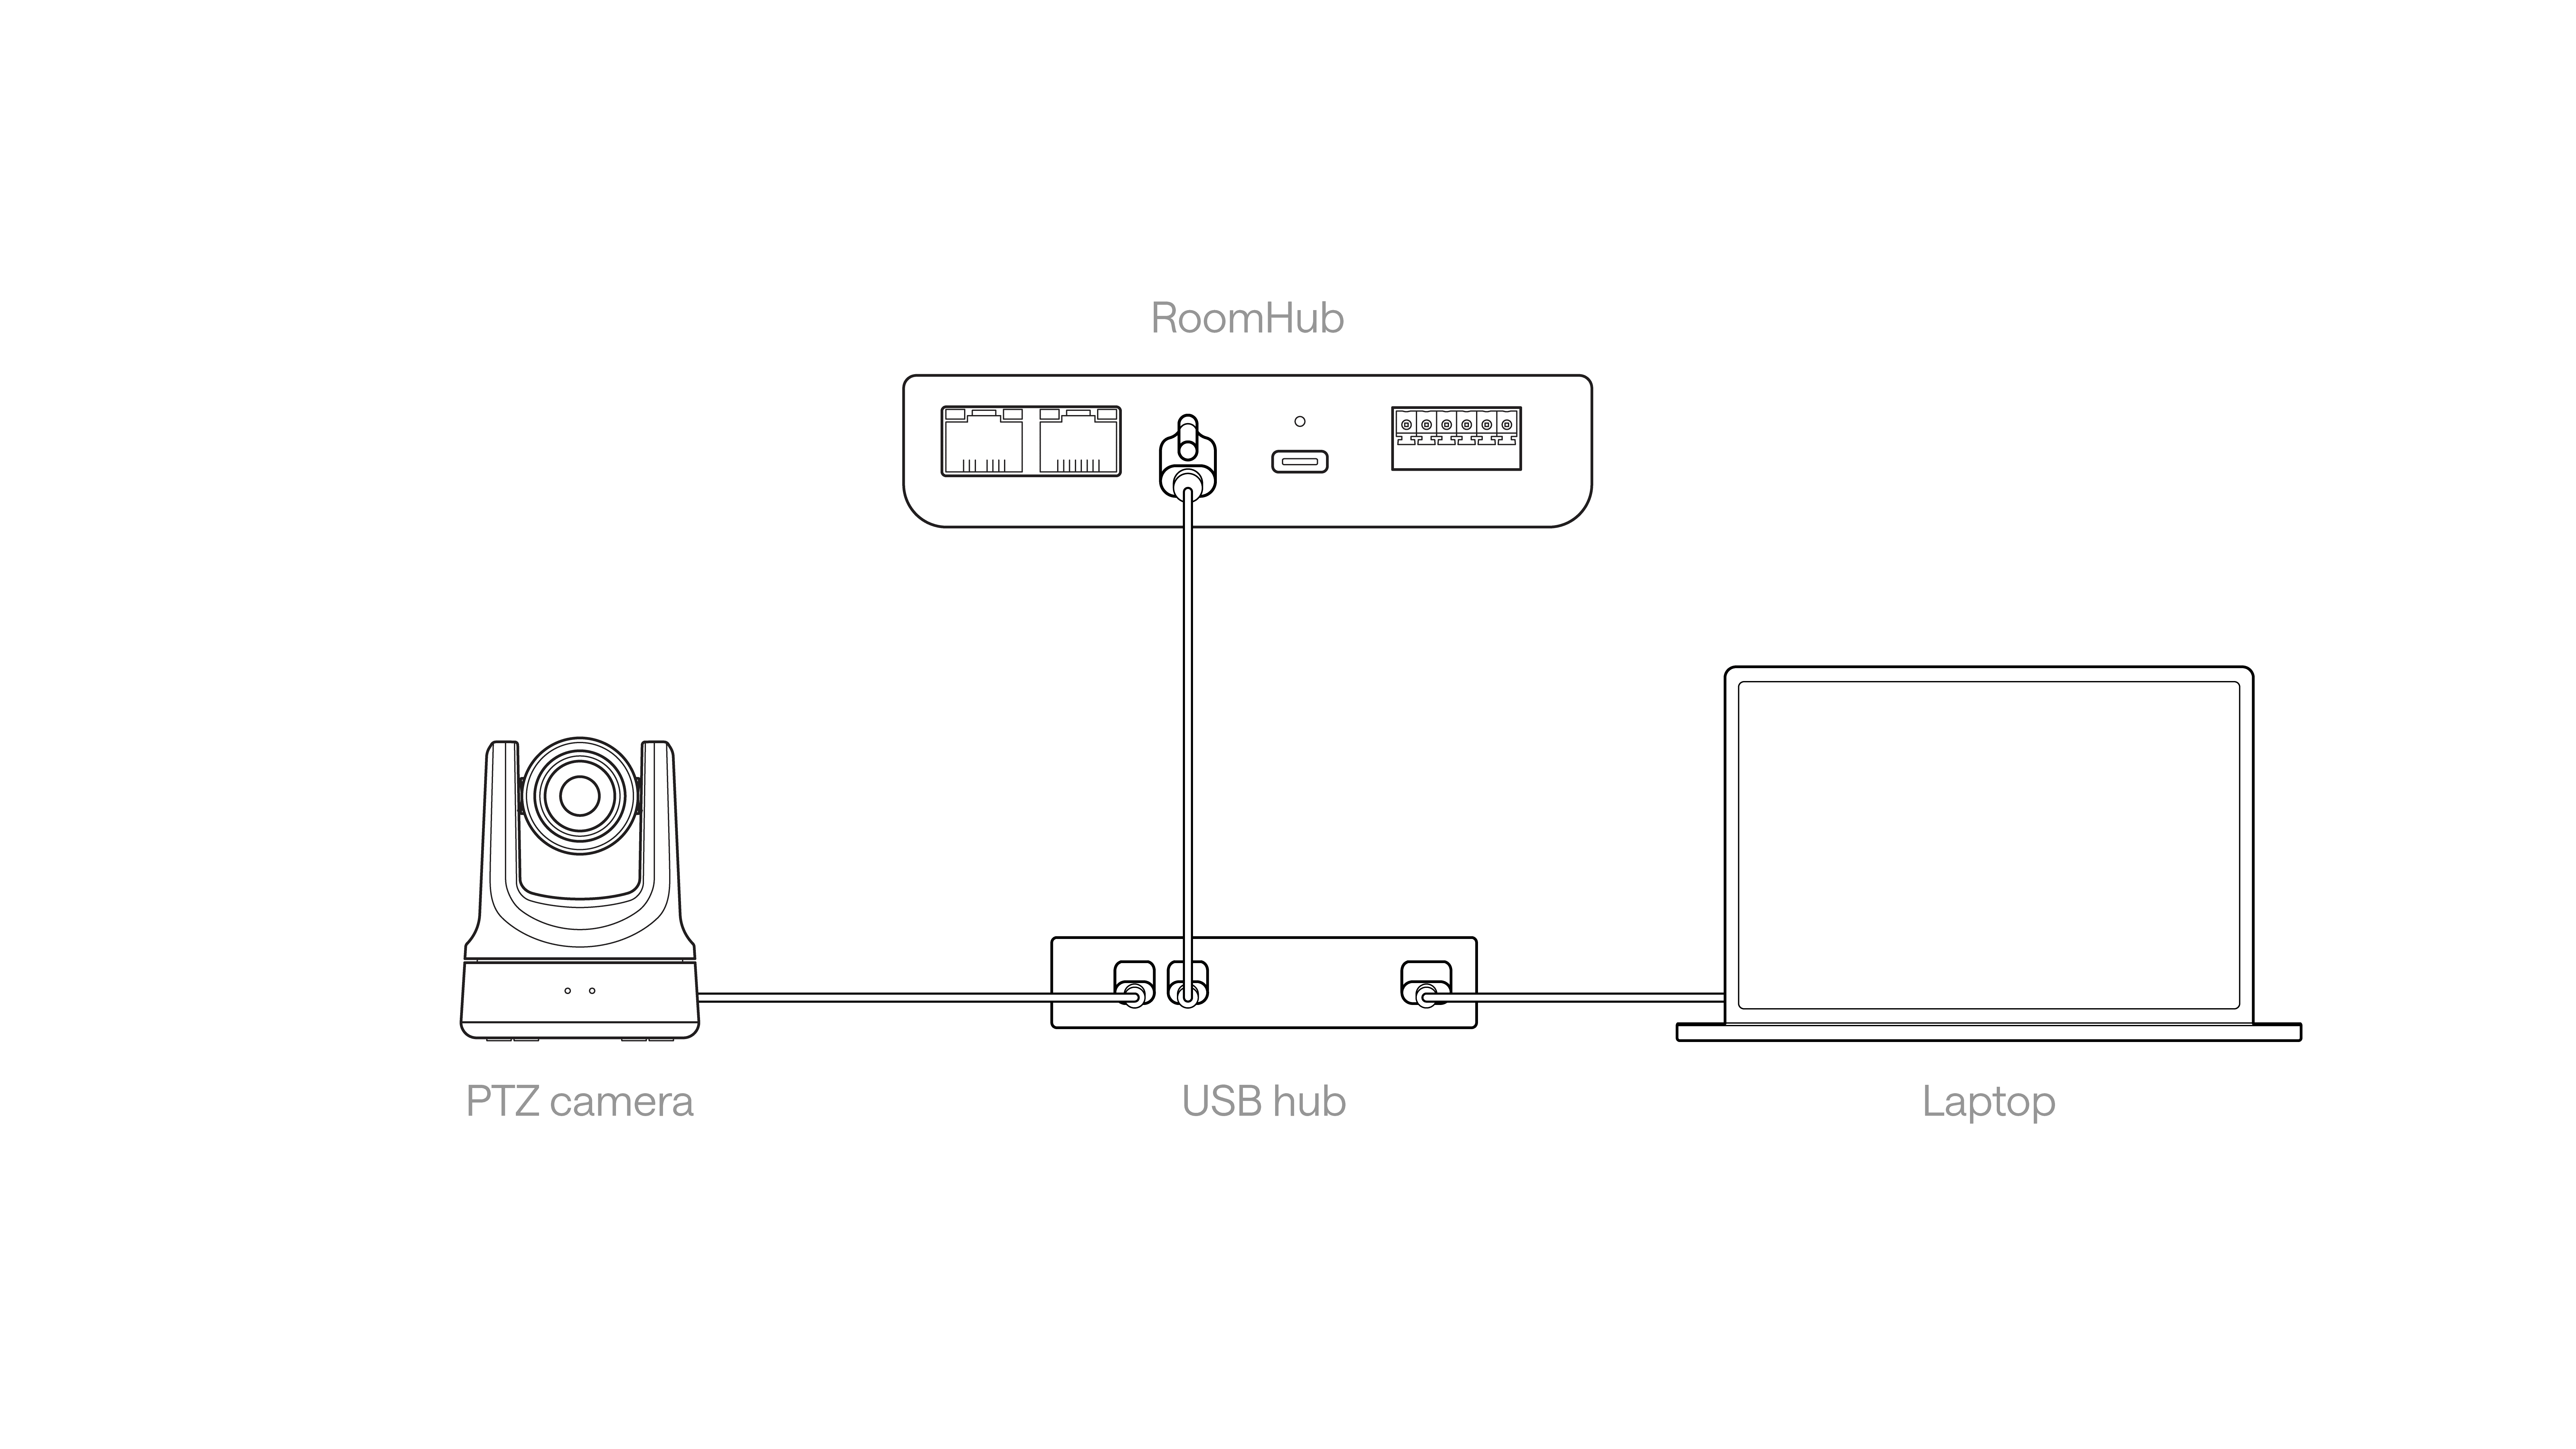
Once connected, audio processing and camera tracking start automatically — no manual setup is required.
———————————————————————————————————————————————
In summary
RoomHub makes BYOD meetings simple:
One USB connection to the laptop
Automatic audio processing and camera tracking
Laptop controls mute and volume
No room-side configuration