Design
Placement Guide
Edited
Where to place the microphone
Clear pickup that gives Room OS the best starting point for automatic tuning.
Overview
RoomHub and Room OS tune, optimise, and manage ceiling microphones automatically. Good placement gives that tuning the best starting point. The guidelines below cover the essentials.

Start with the essentials
1. Place the microphone at the centre of the conversation, not the centre of the room
Aim for where people actually sit and speak, not the geometric centre of the space. Mount the ceiling microphone directly above the table or main seating area, even if the room isn't symmetrical. If the table is off-centre, the microphone should be too.
If the microphone starts in the wrong place, tuning can only partly compensate.
2. Avoid noise sources
Ceiling microphones hear everything, including what you don't want. Keep distance from:
HVAC vents
Projectors
Loud lighting fixtures
Doorways and corridors
Cleaner input gives the system better material to work with.
3. Give the microphone a clear view
If the microphone has a clear view of the people, it will pick them up clearly too. Avoid placing microphones near:
Beams
Soffits
Deep ceiling recesses
Anything that blocks or reflects sound reduces consistency.

Room-by-room guidance
These are the simplest and most reliable placement rules when using a ceiling microphone.
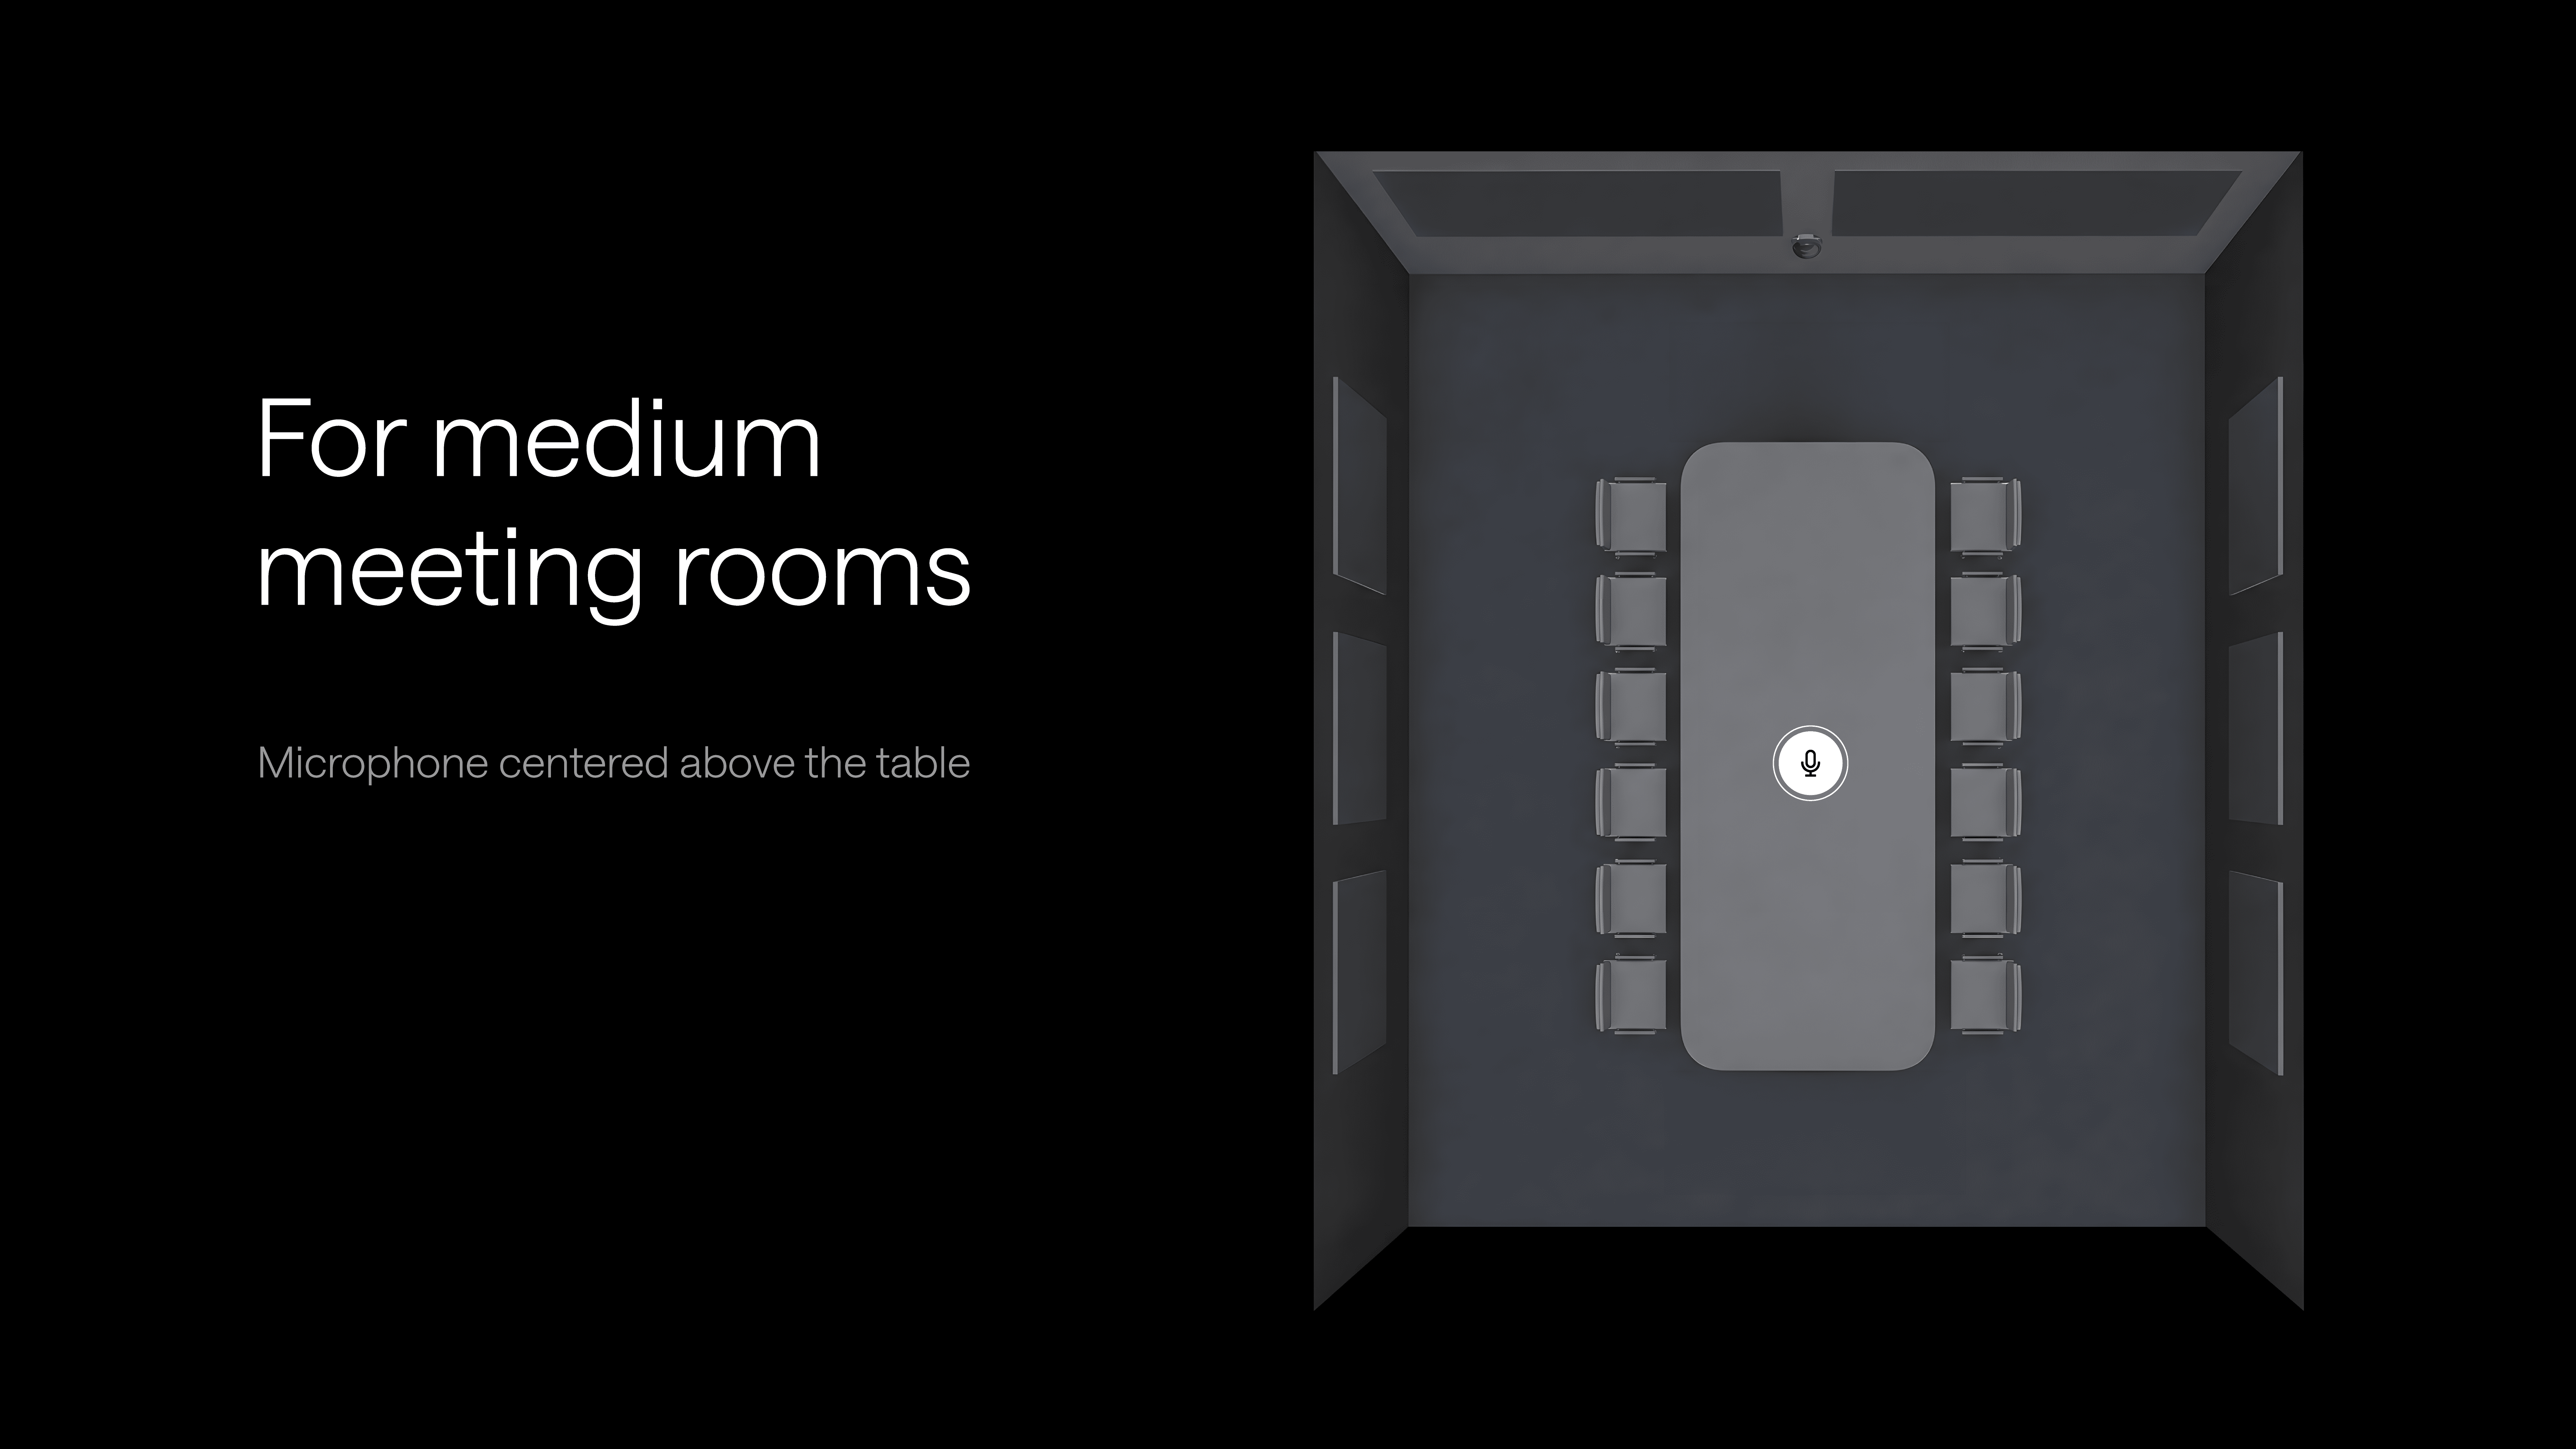
Medium meeting room (10 to 16 seats, single table)
Centre the microphone above the table, aligned with the table's long axis. If the table is off-centre, the microphone should be too.
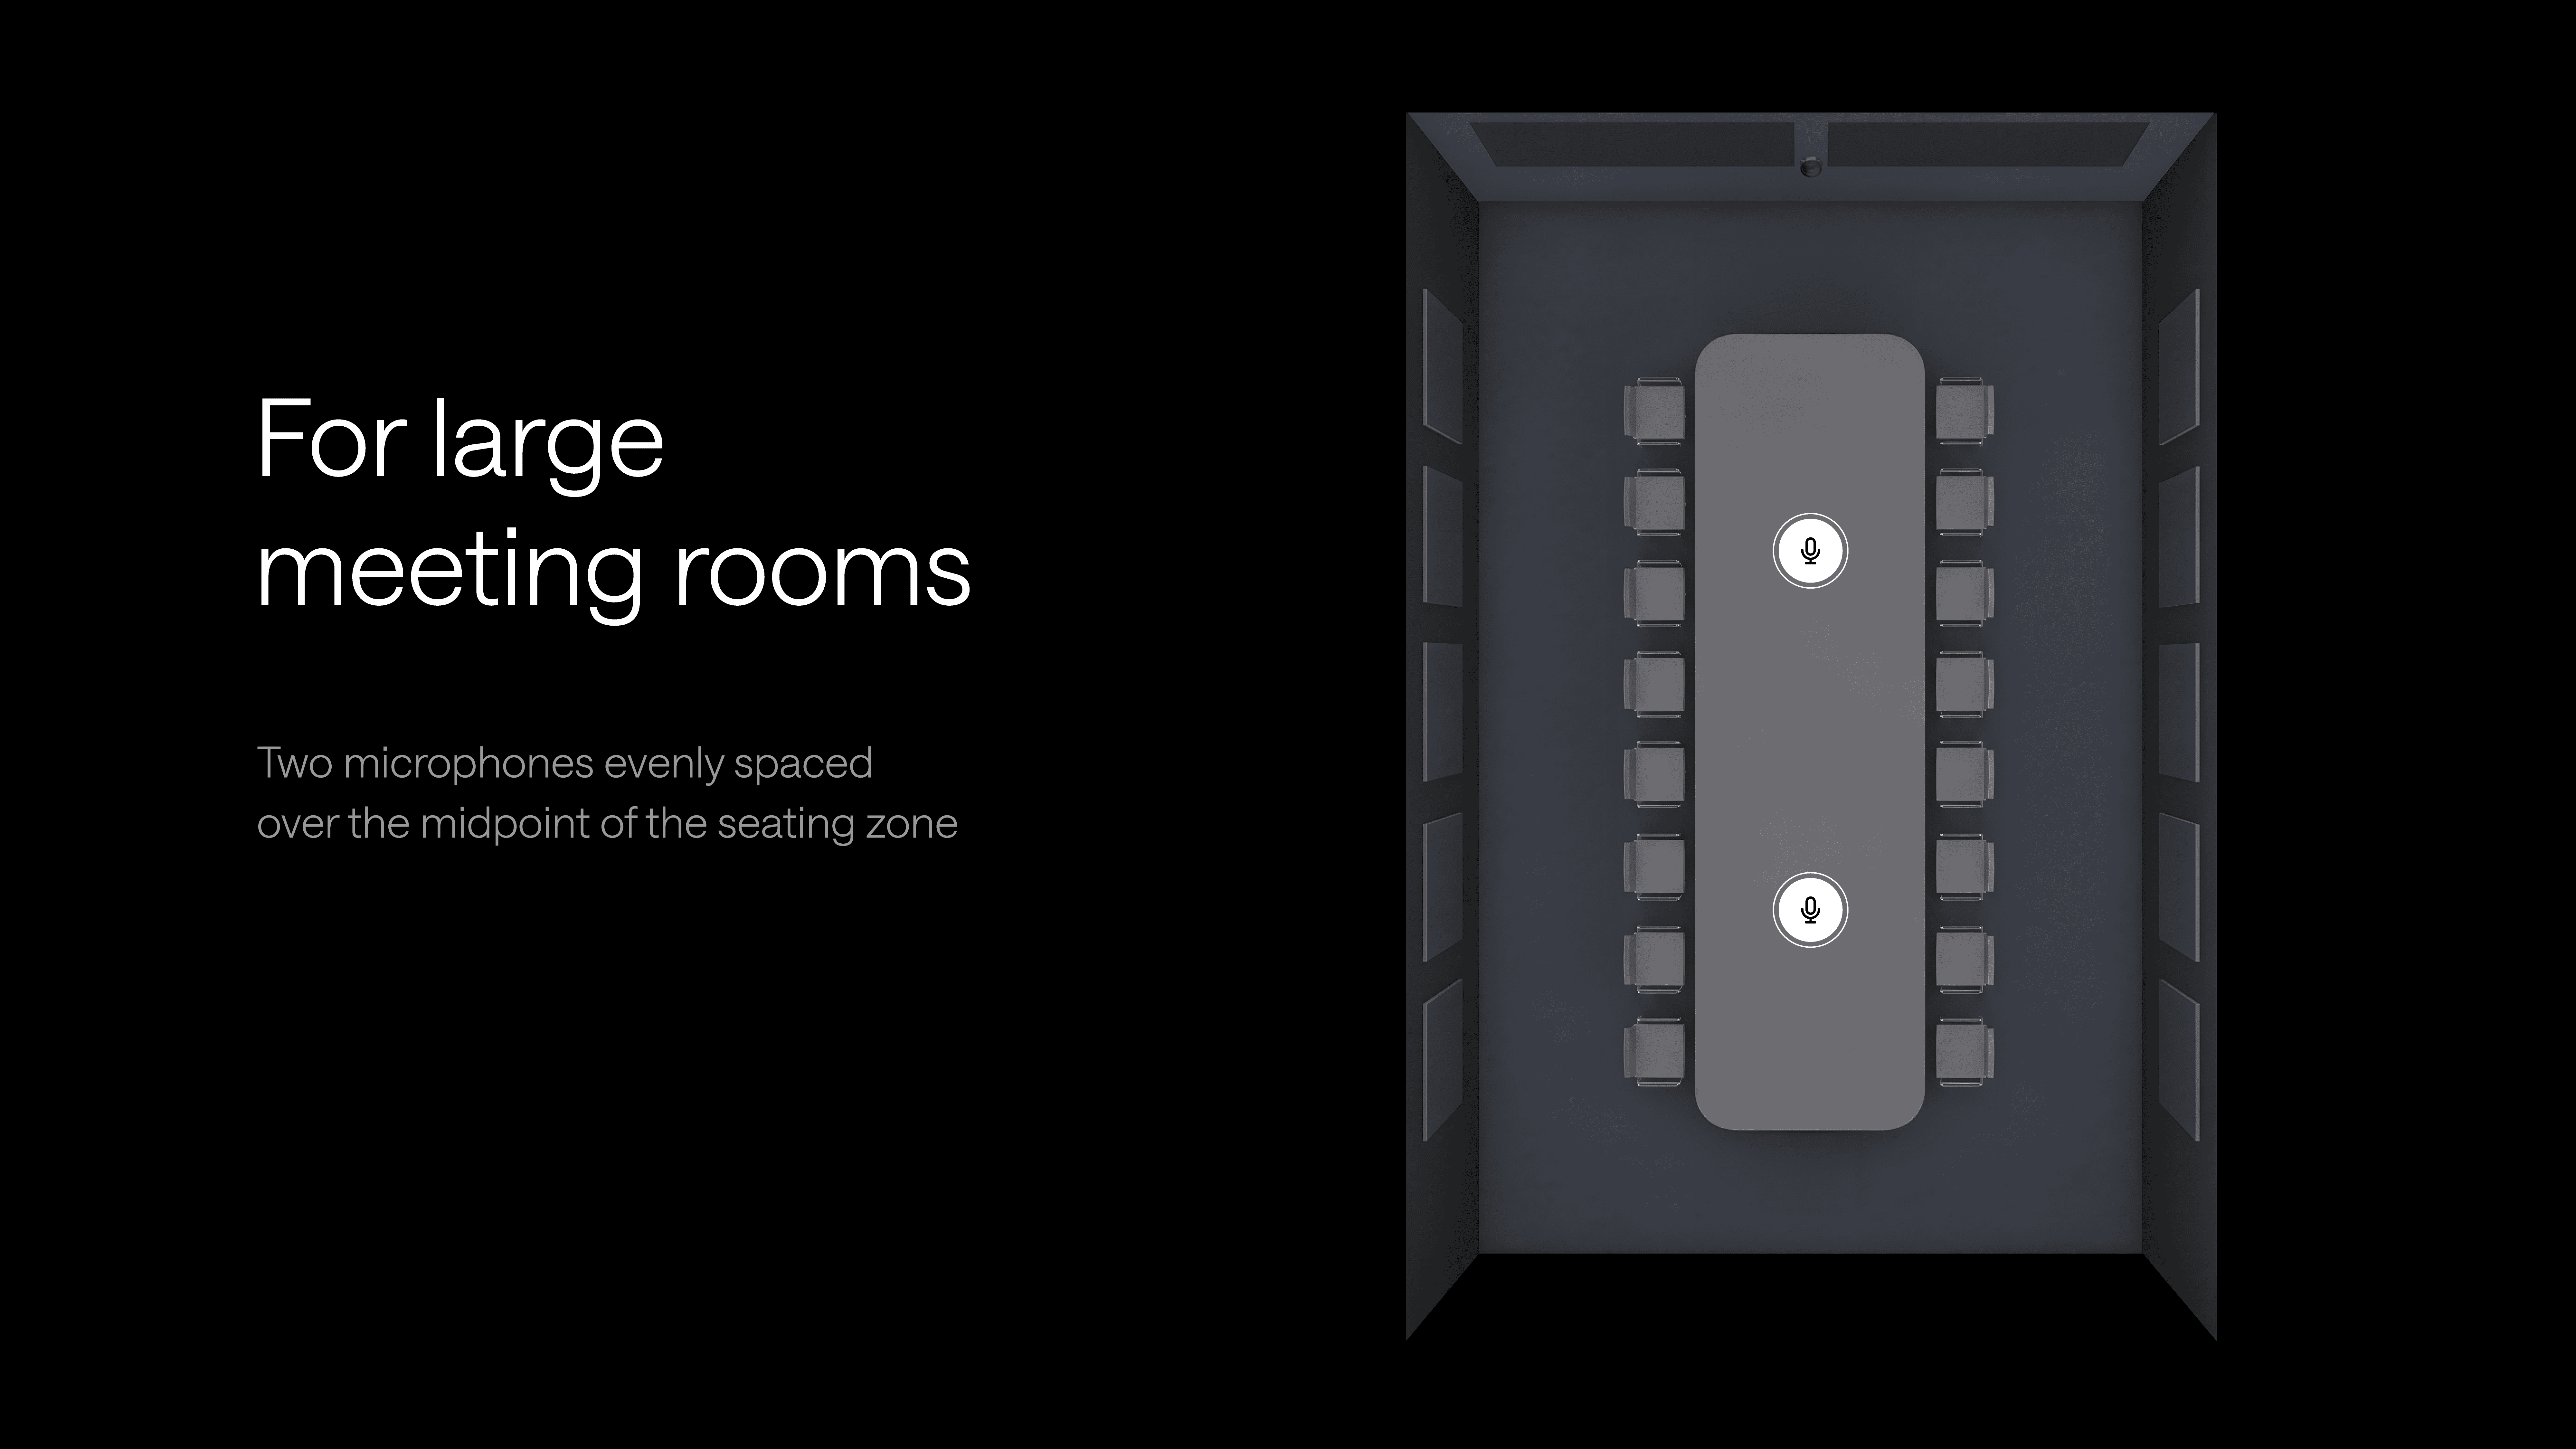
Large meeting room (16 to 24 seats, long table)
Find the midpoint of the seating zone, not the midpoint of the room, and place the microphone directly above that point.
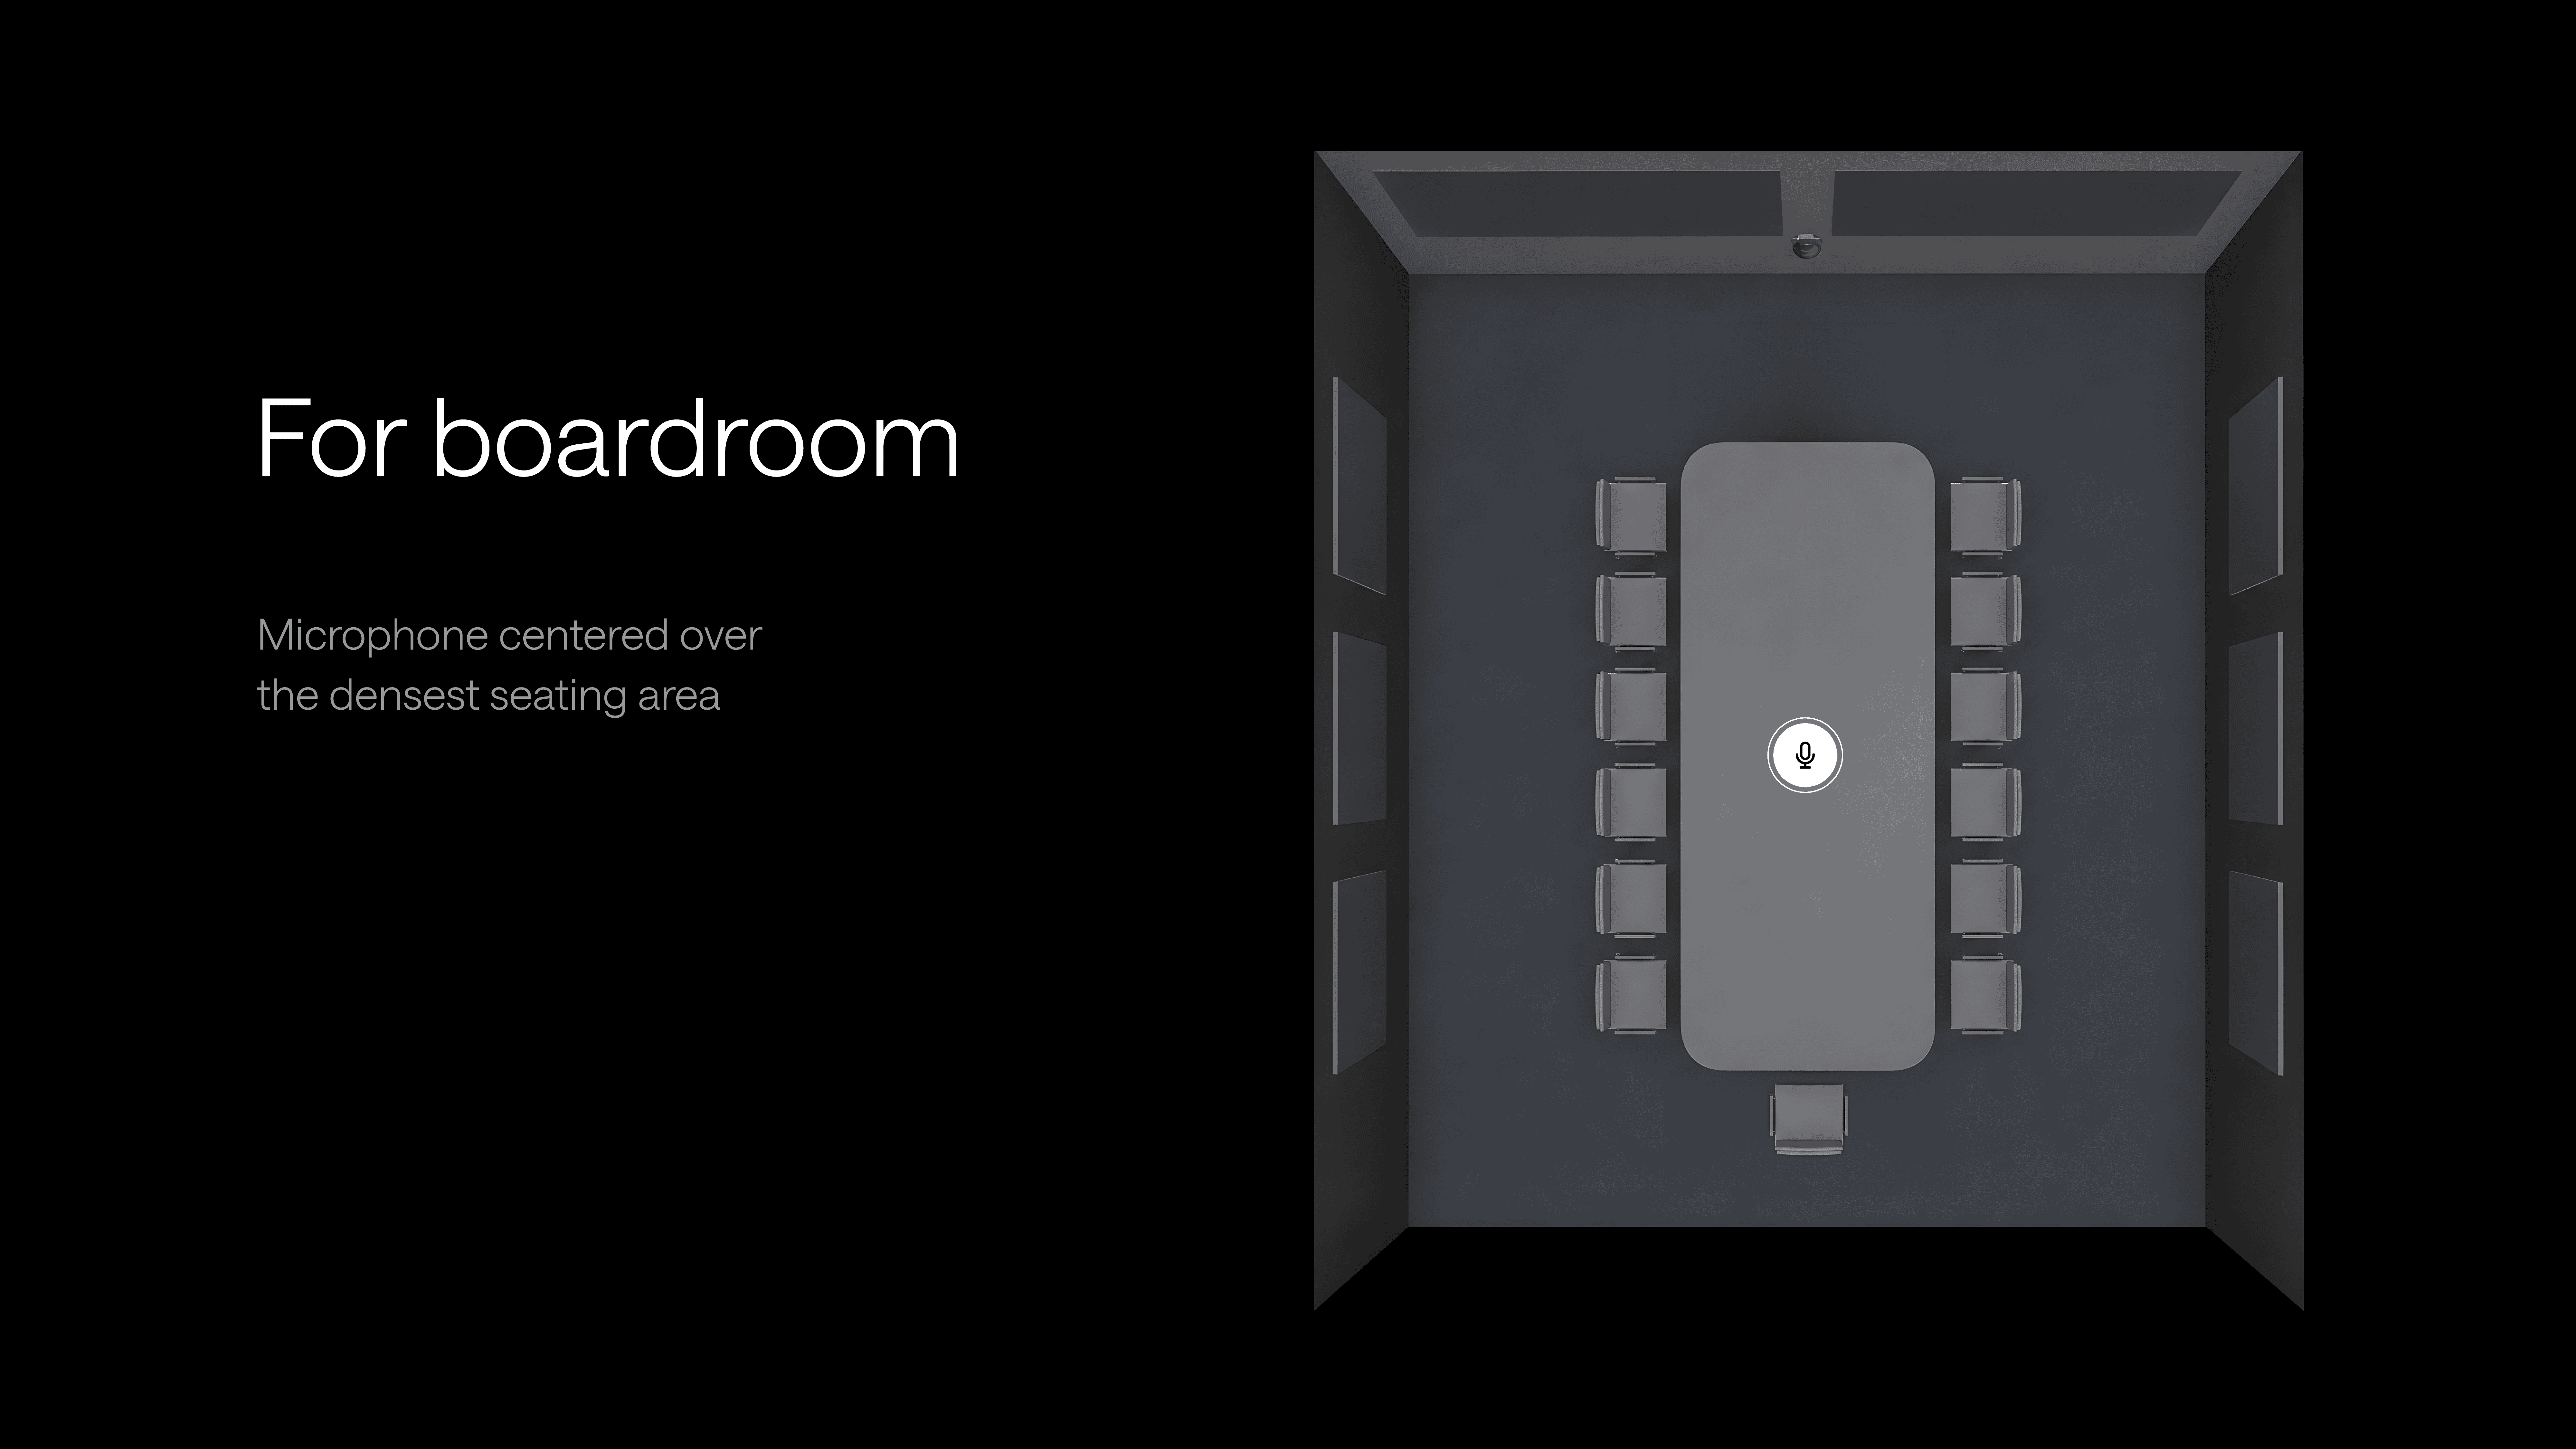
Boardroom (wide or boat-shaped executive table)
Centre the microphone over the densest seating area, usually the middle third of the table. If one person sits farther from the centre, favour the group rather than a single seat.
Training room, U-shape (participants face inward toward the instructor)
Mount the microphone above the open centre of the U, slightly forward toward the instructor. This balances presenter speech with participant questions.

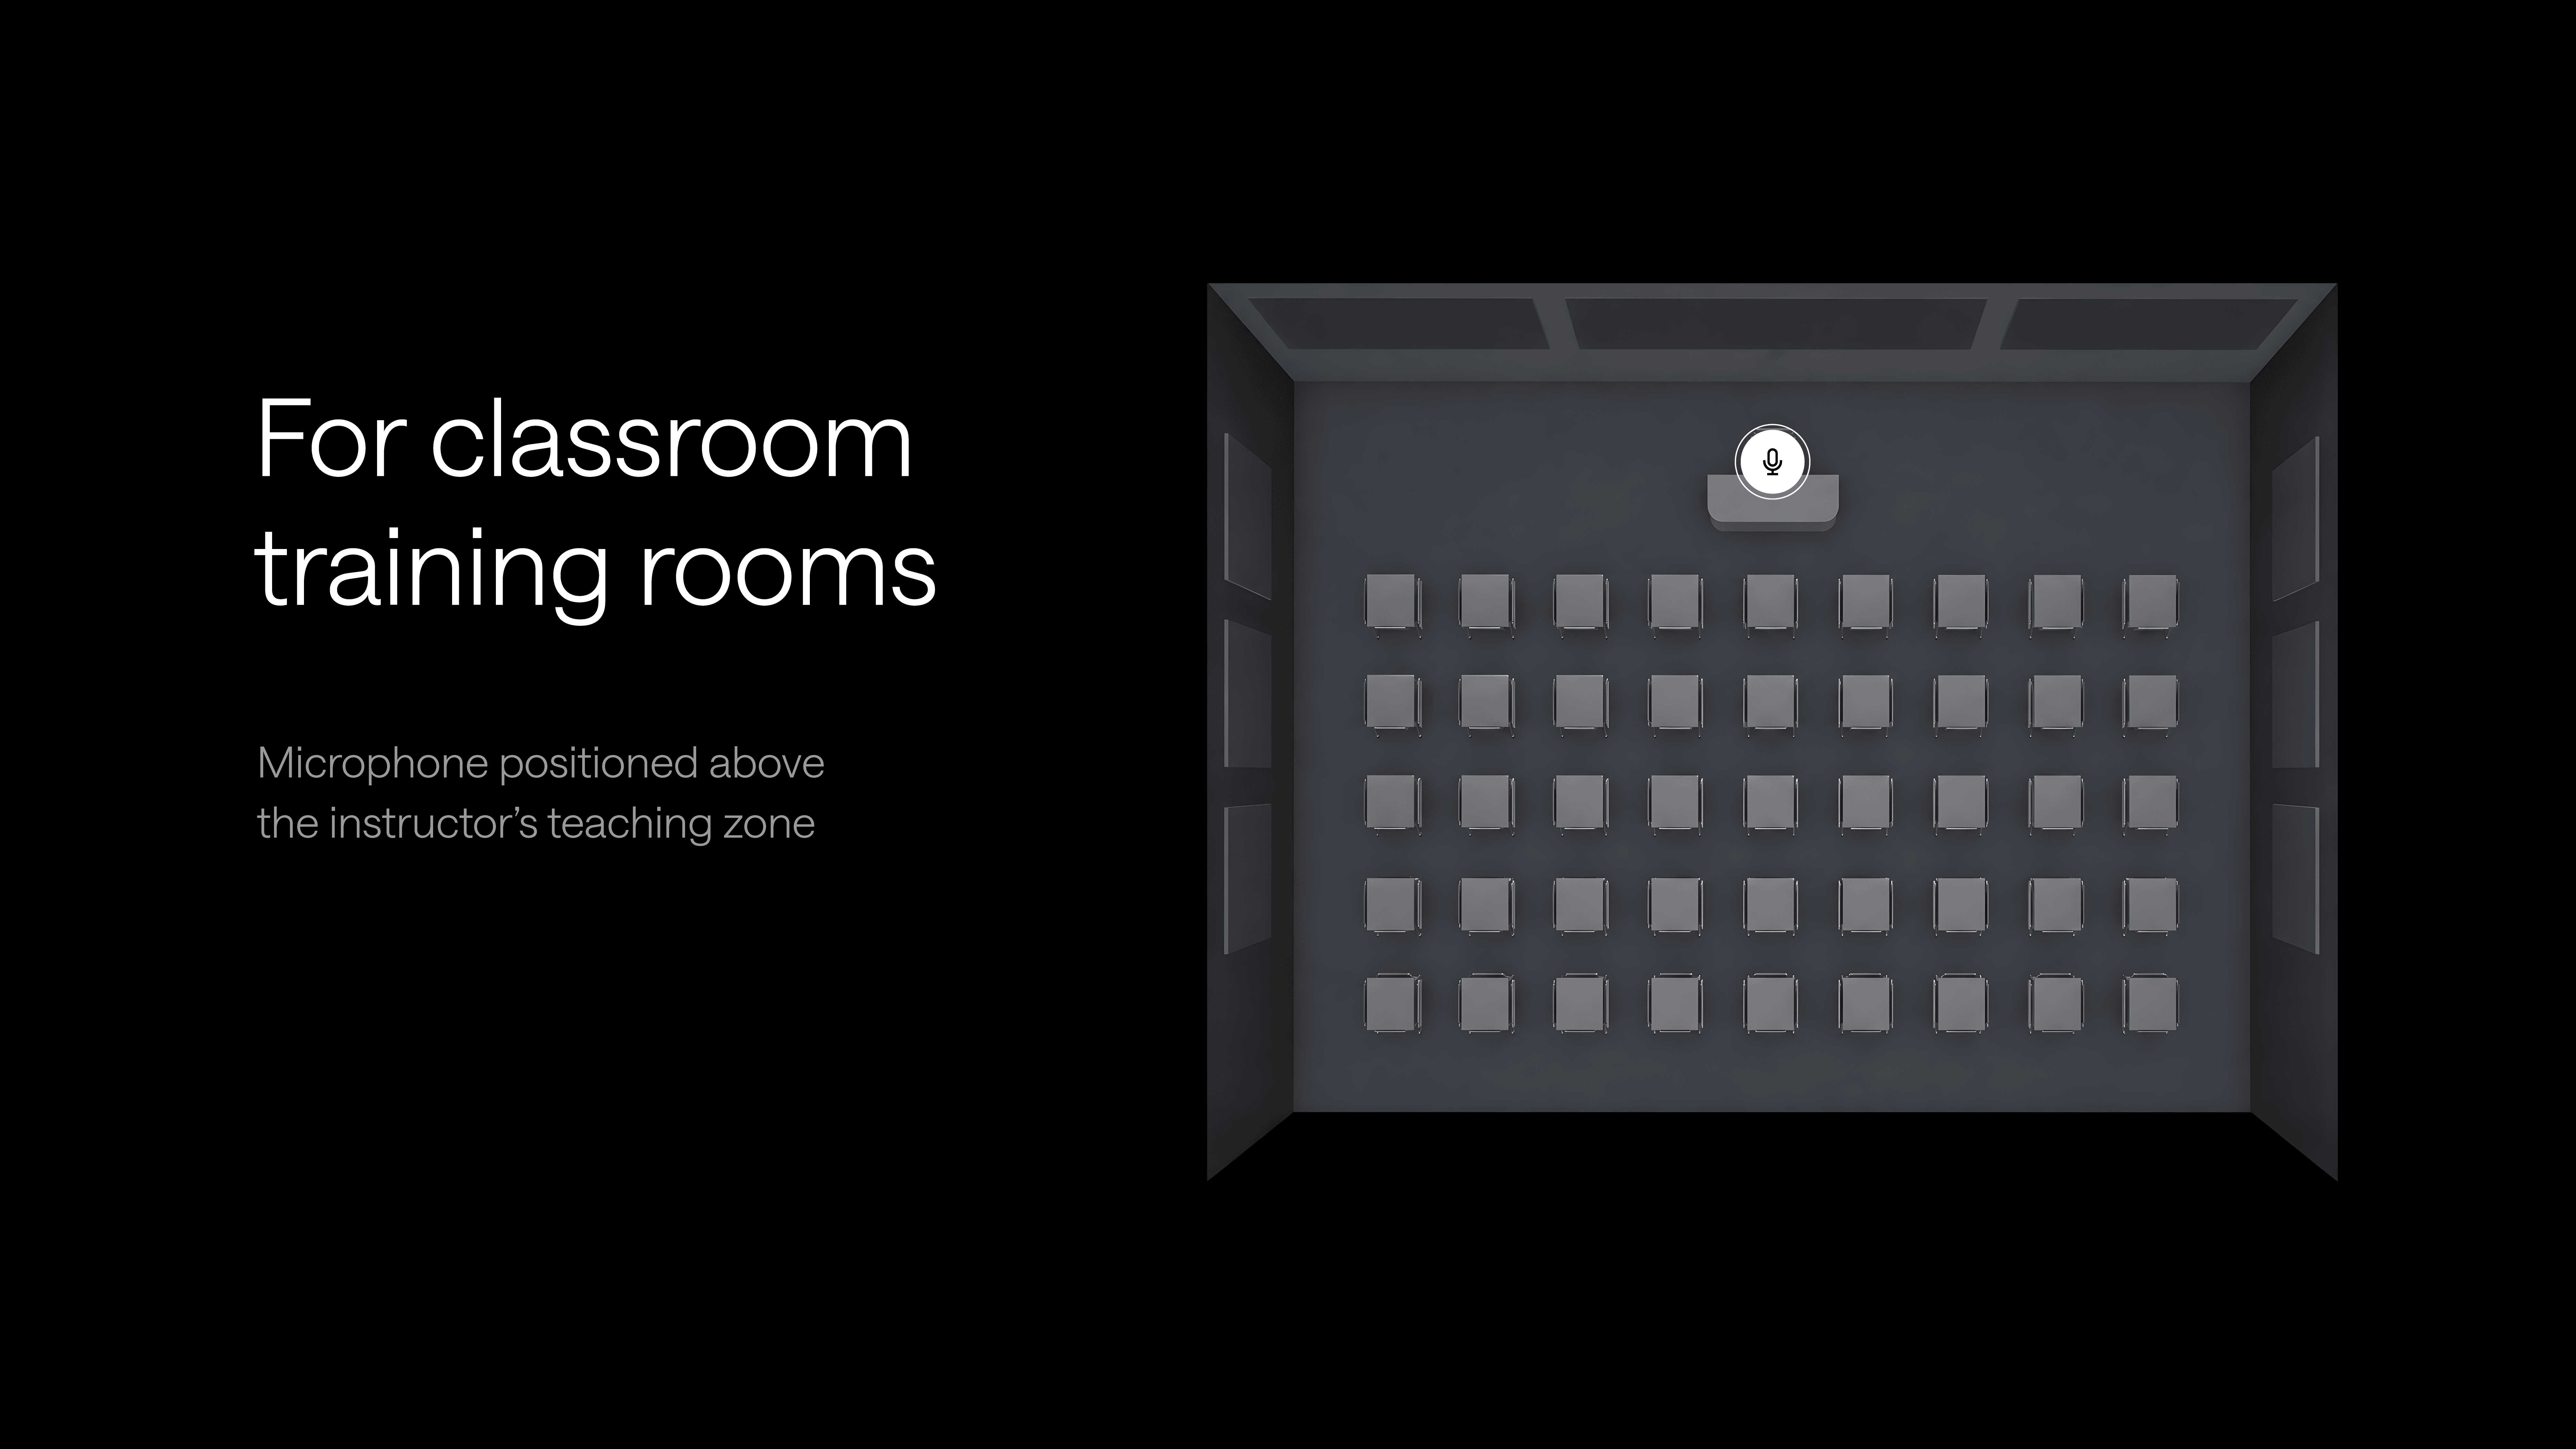
Training room, classroom style (rows facing forward)
Position the microphone above the instructor's teaching zone, typically the front half of the room.
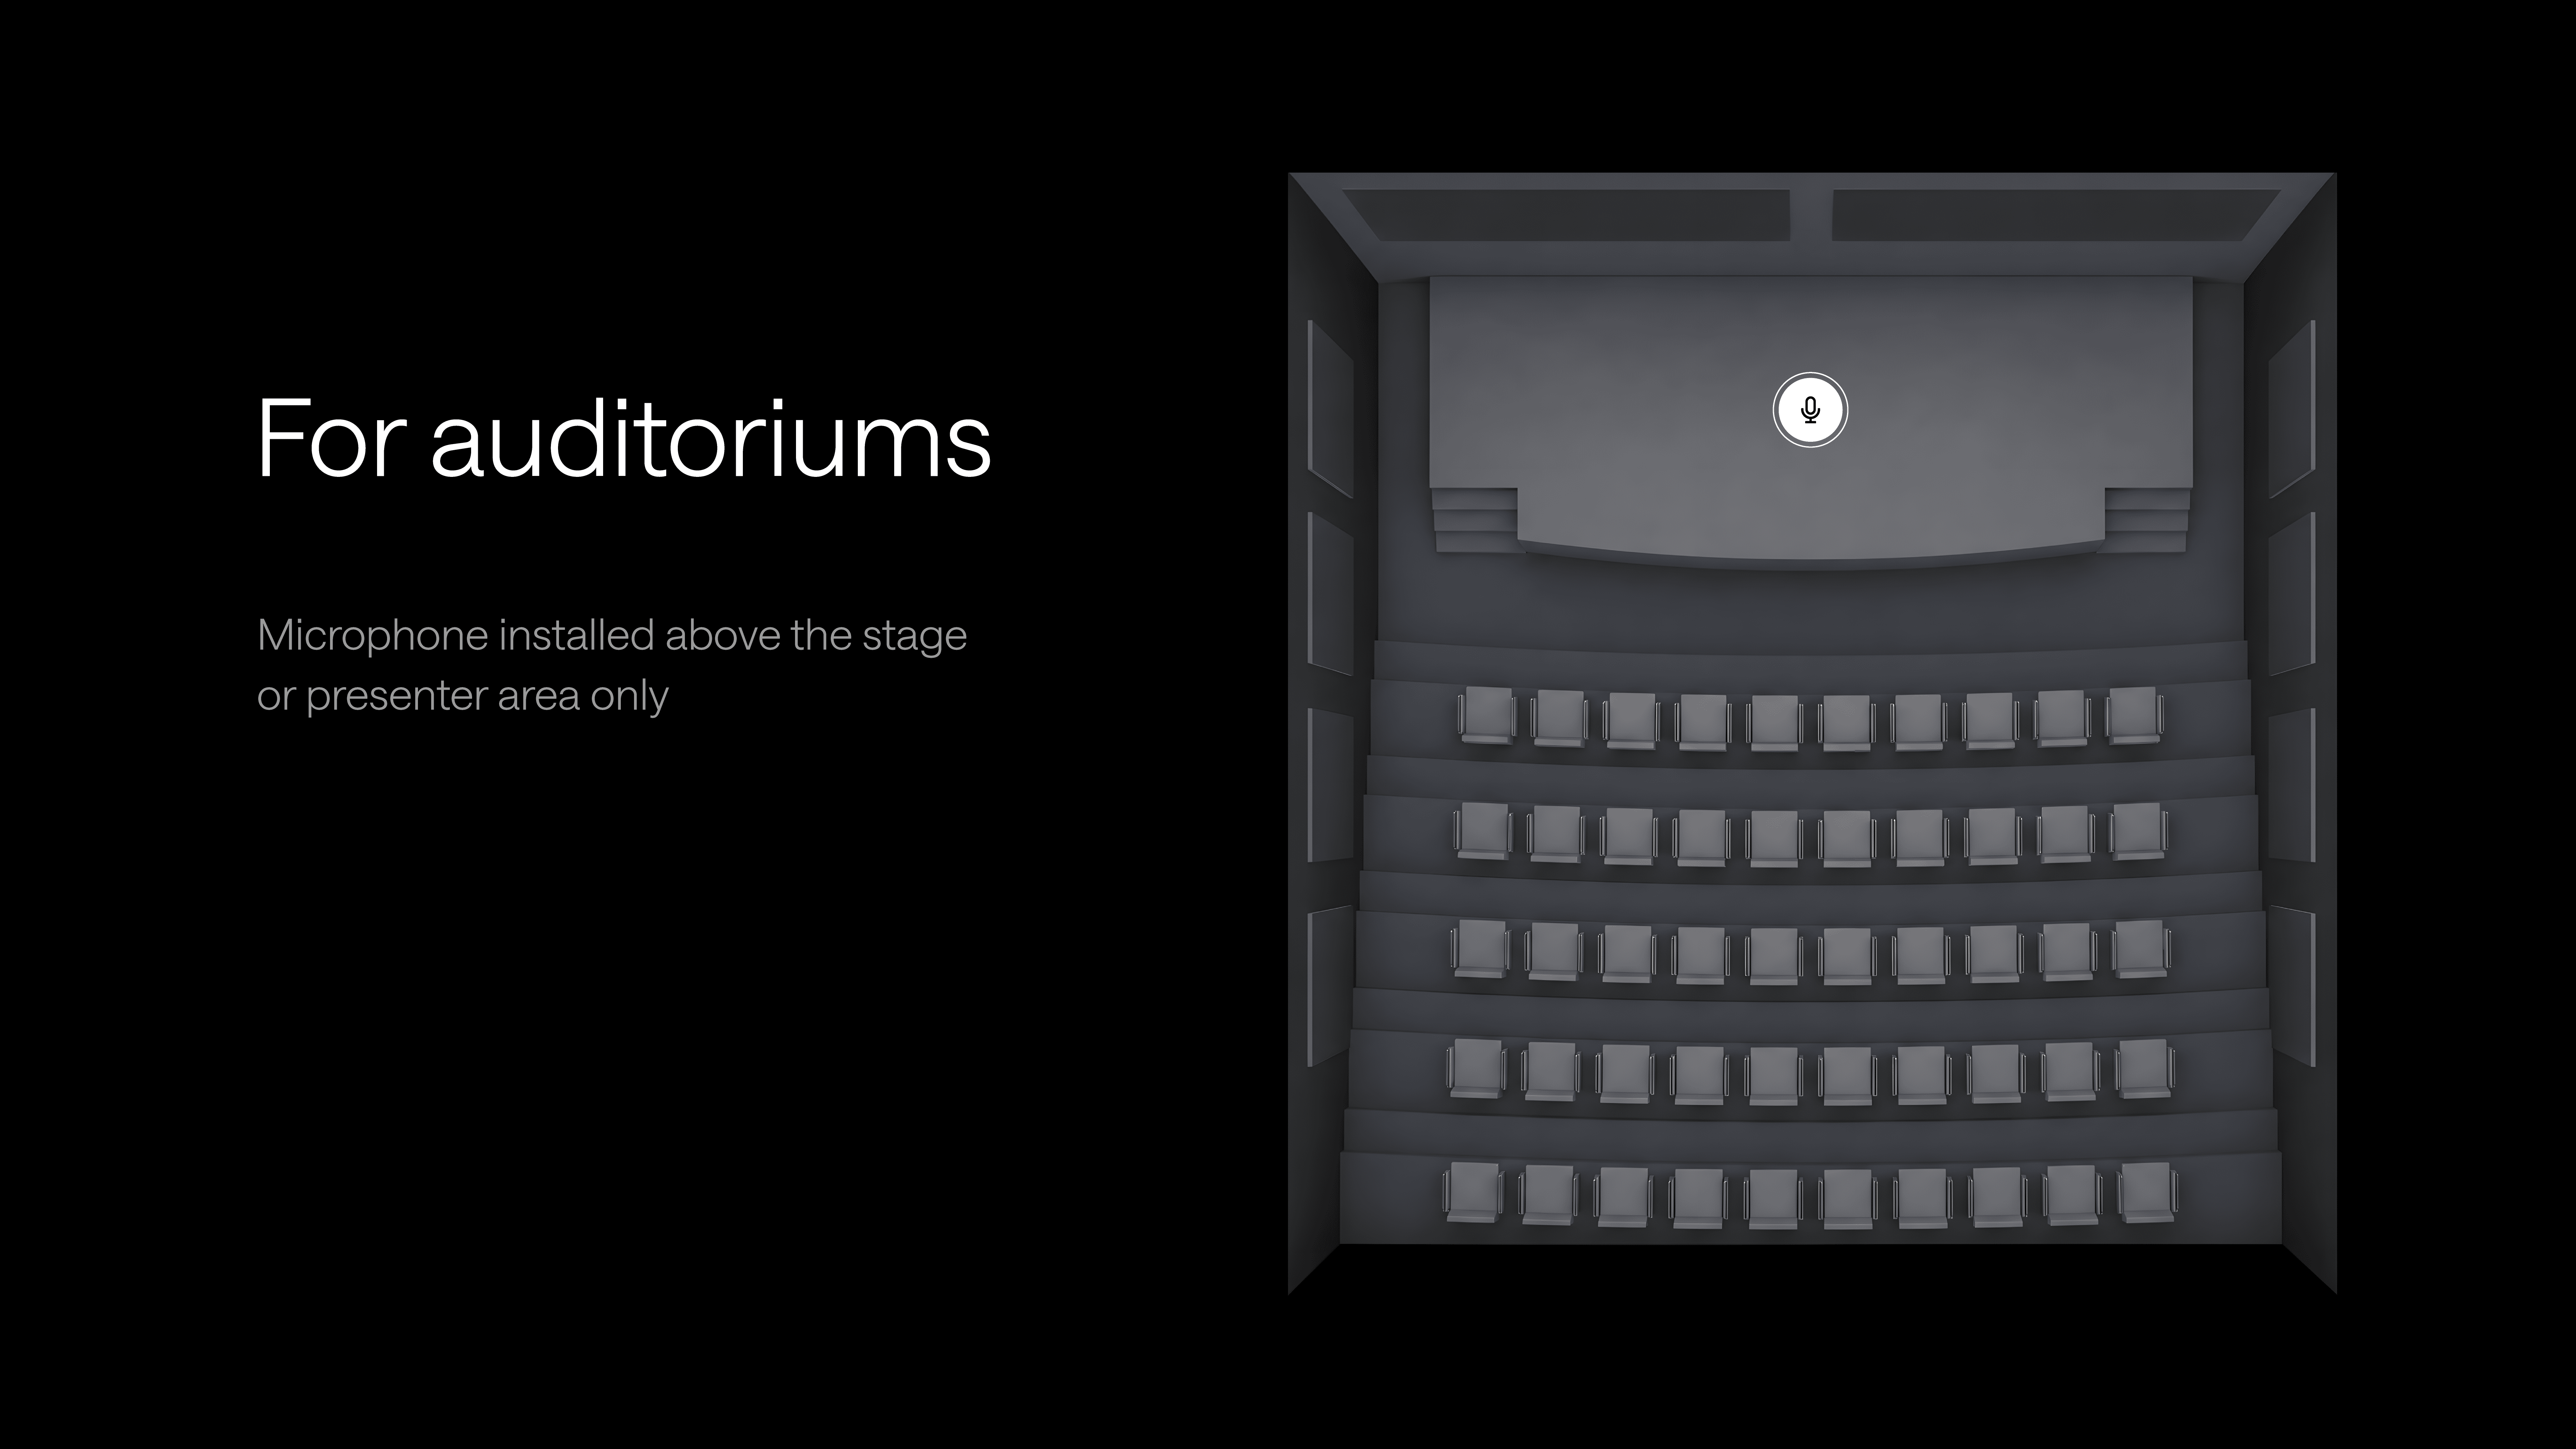
Auditorium (tiered seating, single presenter)
Install the microphone above the stage or presenter area only. Audience microphones should be planned separately.
Microphone selection: what matters most
Different ceiling microphones suit different room types. Start with room size and usage, then confirm the technical limits.
Tip: Use Pleneo Planner to choose the right microphone for your room.
In summary
Good ceiling microphone placement doesn't need deep acoustics knowledge, just a few clear rules:
Focus on where people sit
Avoid noise and obstructions
Mount directly above the conversation zone
With good placement, Room OS tunes and maintains audio performance automatically.